
I am currently working with a customer that has massive restrictions on how they can access resources, not only from their office WAN, but also from their laptops. To mitigate some of the strict controls around accessing resources in Azure, we found out at the beginning of the project that most connections from their own WAN were denied. They do not have an ExpressRoute deployed, nor a VPN. We needed to find a way for them to connect to their virtual machines running in Azure. We did find that HTTPS (port 443) is allowed.
We moved our project offsite to avoid the WAN connectivity issues as it was just completely stalling our ability to connect to anything (including various websites like GitHub, Azure DevOps, etc), but there were still limitation on their machines themselves to disable SSH and RDP access to their VMs.
Instead we launched the Azure Portal and used Bastion for their access, solved!!
I am going to walk through how to configure Bastion and some gotcha’s that we noticed.
What is Bastion?
Bastion is a PaaS (Platform as a Service) offering that allows you to connect to your VMs running in Azure over SSL. It removes the requirement to use RDP or SSH. While RDP/SSH are the go-to methods of connecting to your workloads, it also opens up your VM to a more penetrable attack surface. Years ago, I heard that the largest attacks in Azure are on RDP/SSH ports, so this is the solution to gaining single server access without exposing your workloads to high risk attacks.
Bastion works by creating a subnet within your vNET and exposing itself as you would a traditional jump host. Since this is a PaaS service you don’t have to manage a VM and all the headaches that go along with it (patching, backups, etc). The Bastion service is built and designed to withstand attacks and can be deployed into your perimeter network (DMZ) or into a specific vNET.
Once deployed, an end user will connect to the Azure Portal using any preferred HTML5 browser. The user will select the VM to connect to and with a single click (and a password input), the RDP/SSH session opens in their browser. A public IP is not required on that VM because Bastion takes the incoming request on port 443 and performs a NAT to the internal IP address of the server over ports 3389/22.
The diagram below walks you through this:

At this time of writing this blog, Bastion is only available in the following locations:
West US, East US, West Europe, South Central US, Australia East, Japan East
Creating a Bastion Host
Create Bastion from the Azure Portal
To configure Bastion you can do it via the Azure Portal or via PowerShell. I am going to walk through it via the Azure Portal first.
Let’s assume that you have existing virtual machine that you need to get access to. First, we need to create the Bastion service. Go to your Marketplace and type in ‘Bastion’ and select ‘Create New’.
You will be sent to a new landing page where you will need to configure the service. The configuration is pretty self-explanatory, select your subscription and defaults:
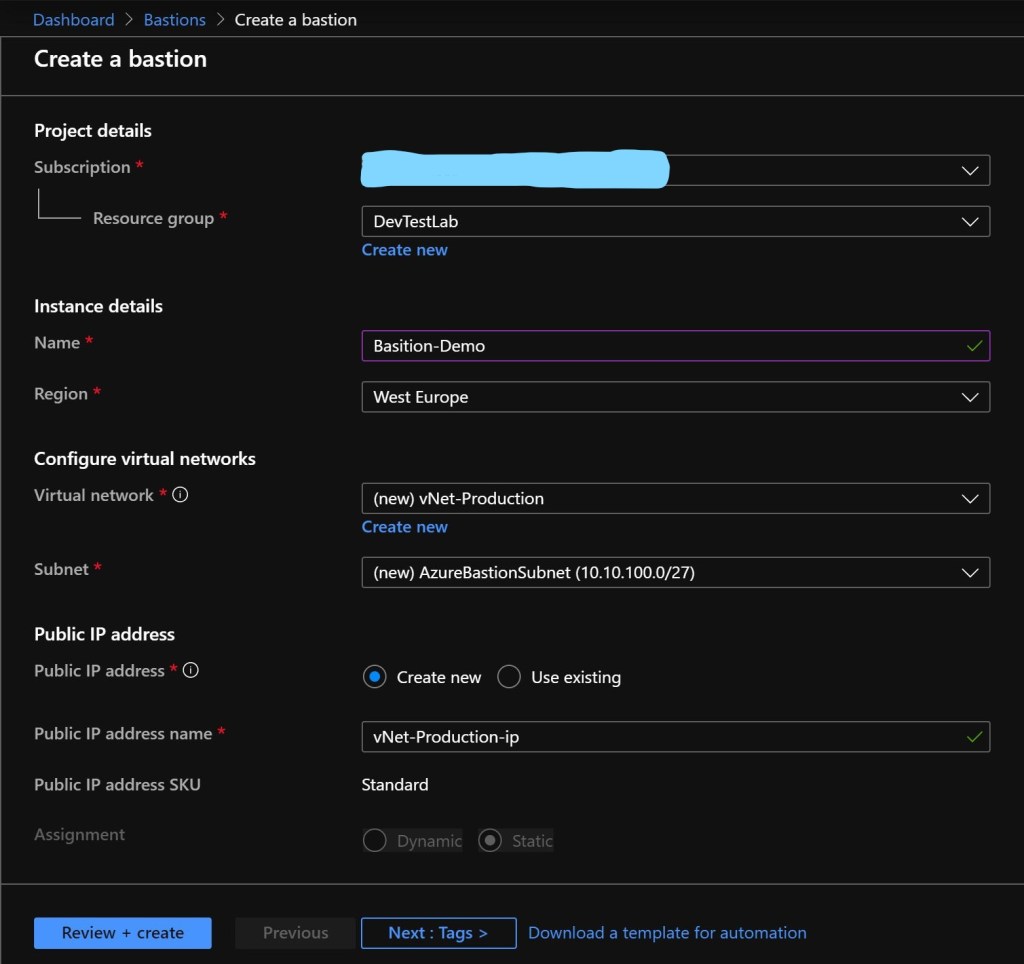
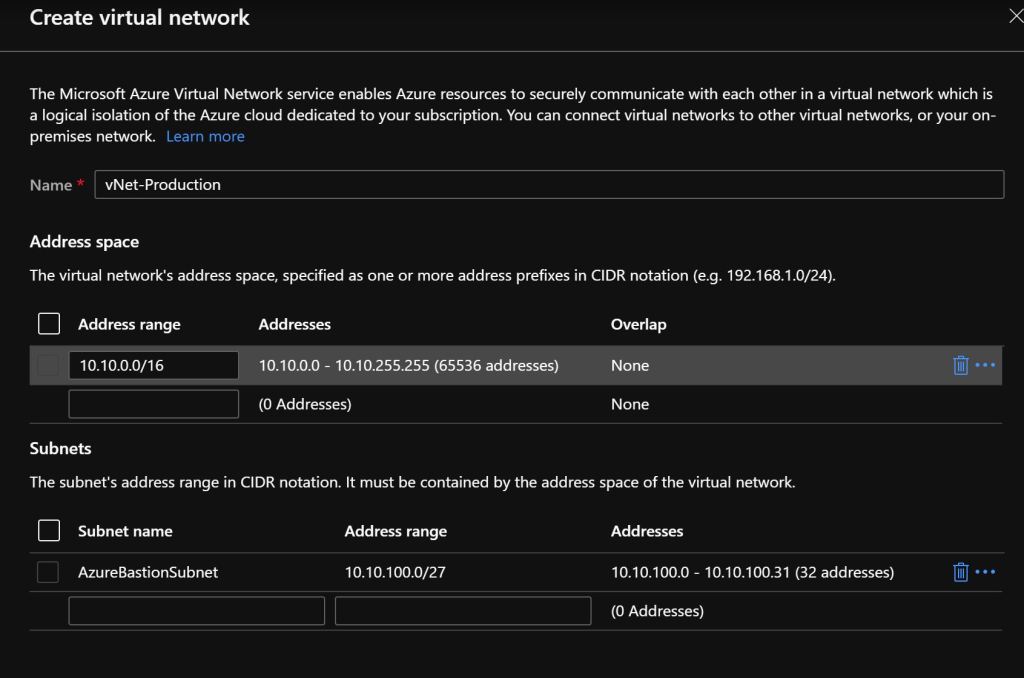
There is a caveat to the network configuration, you may use an existing vNET, but the subnet in which you deploy the Bastion host to must be named ‘AzureBastionSubnet’ and must have an address space of at least /27 (or larger /26, /25, etc….).
Great, your Bastion service should be configured once you select ‘Review and Create’
Create Bastion via PowerShell
If you want to create your Bastion host via PowerShell the same rules apply for networking, etc. The scripts to execute the Bastion service is below:
Create the networking components:
$subnetName = "AzureBastionSubnet"
$subnet = New-AzVirtualNetworkSubnetConfig -Name $subnetName -AddressPrefix 10.10.100.0/24
$vnet = New-AzVirtualNetwork -Name "myVnet" -ResourceGroupName " myBastionRG " -Location "westeurope" -AddressPrefix 10.10.0.0/16 -Subnet $subnet
Create a public IP for Bastion (not required):
$publicip = New-AzPublicIpAddress -ResourceGroupName "myBastionRG" -name "myPublicIP" -location "westeurope" -AllocationMethod Static -Sku Standard
Create the Bastion service within the subnet:
$bastion = New-AzBastion -ResourceGroupName " myBastionRG " -Name "myBastion" -PublicIpAddress $publicip -VirtualNetwork $vnet
Wait a few minutes and your Bastion service should be deployed successfully.
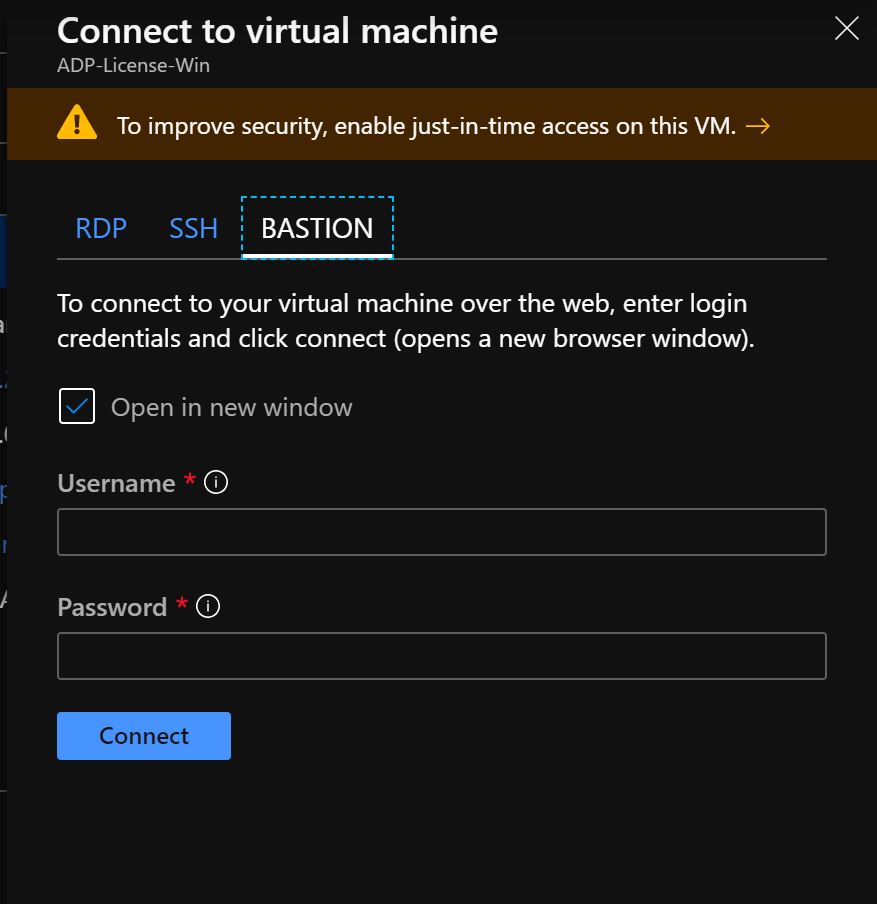
Connect to a VM
Navigate to the VM that you would like access to. On the Overview page, select ‘Connect’

A small window will open up on the right-hand side and you’ll see options for RDP, SSH and Bastion. Click on the Bastion tab. Then use ‘Use Bastion’
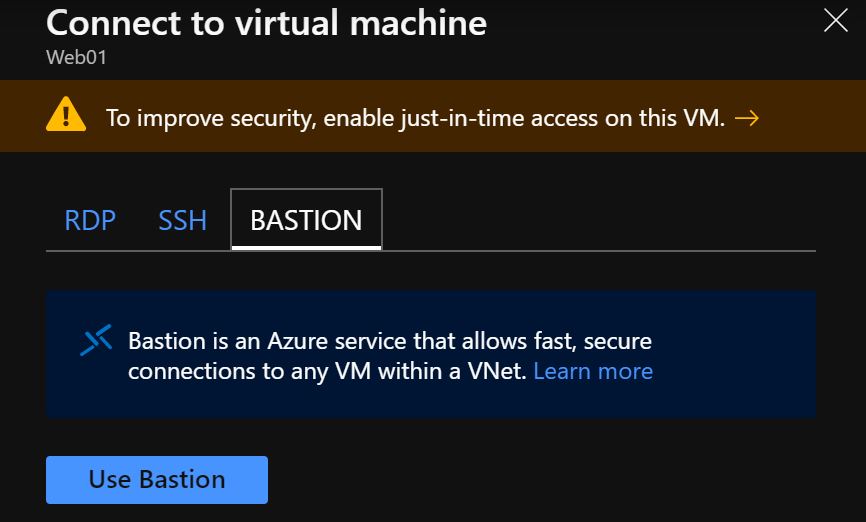
If your virtual machine is located in the same vNET as Bastion then a login box will appear, else you will need to configure Bastion for that vNET. Enter in your username and password and click on ‘Connect’.
And you should see your desktop open in your browser:

Learnings/Things to Know
Since we are working with Bastion to connect to our active workloads in Azure there are some caveats and learnings that I experienced that I hope you can benefit from.
Screen Resolution
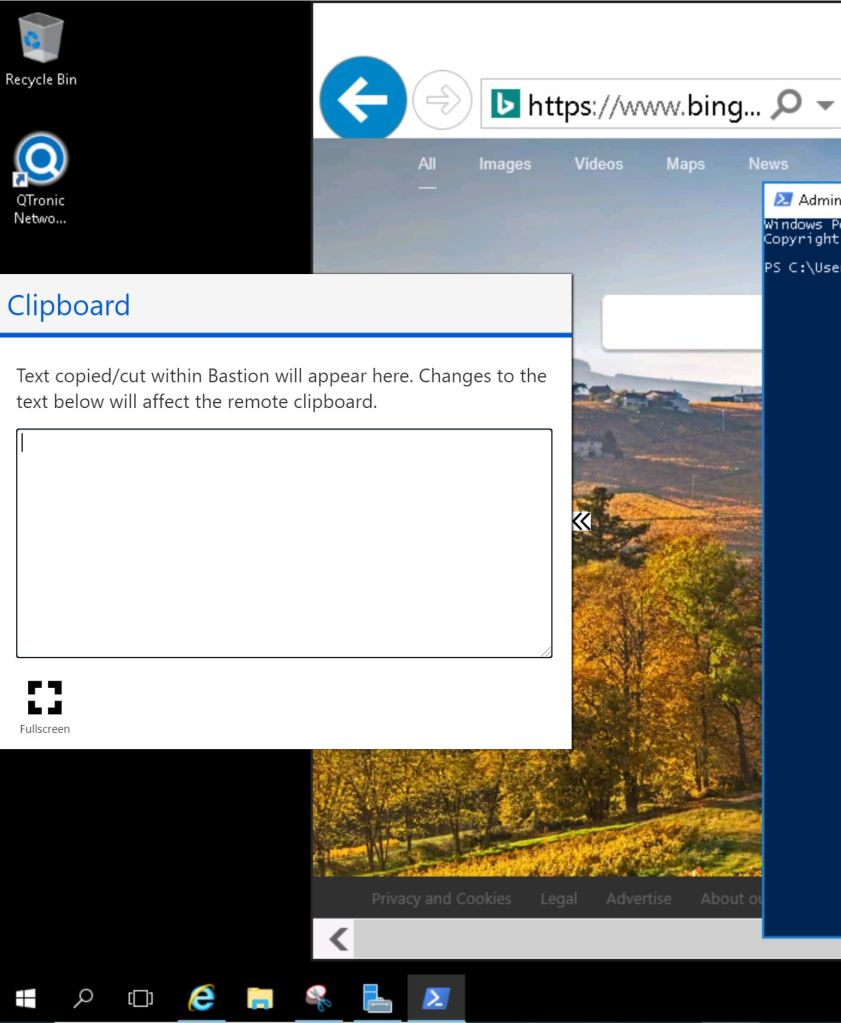
There were some issues with screen resolution when working in a VM from your browser. In order to see the full application and screen navigate to the small grey arrows on the very left of your window and click on it:

When you click on the grey arrows a white box will pop out, click on ‘Fullscreen’ and your field of view will format to a readable and more workable view:
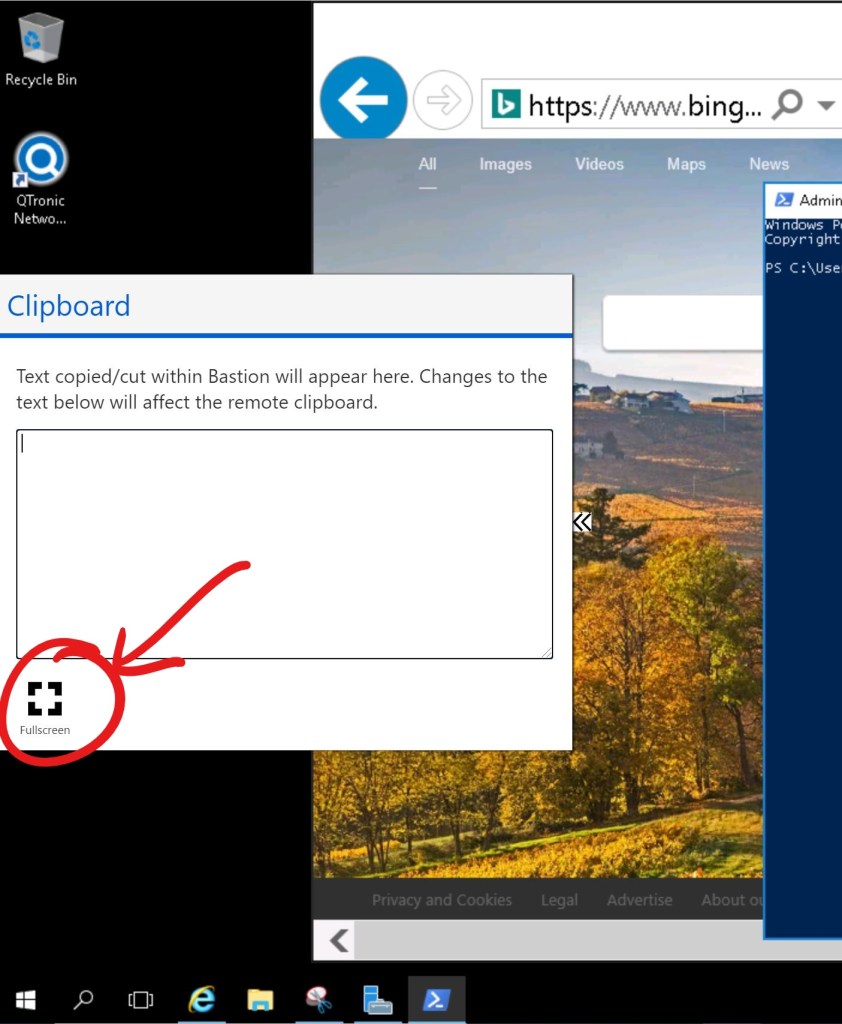
Copying/Pasting into the VM from Bastion
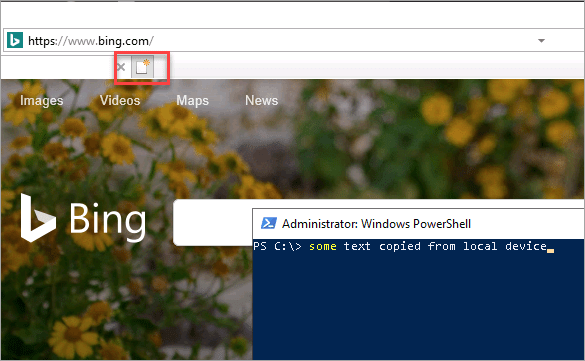
If you want to copy/paste any kind of text/code etc directly into your Bastion session (as you would with RDP), your browser must support advanced Clipboard API access. You may see a pop up allowing access for direct copy and paste:

In the instance with my specific customer, their browsers were blocked form advanced Clipboard API access, as well as pop ups. In that case you will need to utilise the Clipboard (accessible from the double grey arrows from above).
Your copied text will be visible in the Bastion copy/paste palette, else you can manually copy it into the palette. Once the text is visible in the area, you can paste it to the remote session
Keyboard input language issues
While trying to input some code and special characters we had some fun with working with non-US keyboards. Bastion does not inherit your keyboard input. Just like RDP session, it uses the keyboard language that is set on the VM. We set the language on the VM to the language input that we required, but that still did not work. Trying to type in special characters and work on a non-US layout is ‘fun’ to say the least, it was a case of trial and error. After switching the keyboard layout to UK English and German did not get us the desired results. After switching back to the US keyboard input, it worked. A bit of a weird one, I assume some multi-language support is in the future.
Thus far a great product that enabled us to overcome some heinous blockers in our project. Time to deploy some code into our VMs more securely.

Great blog you haave
LikeLike
Thank you!!
LikeLike